As you can see the poor vanity needed all sorts of wood work, but not too worry, it was not hard. A lot of the veneer was missing in the corners of the drawers and just a bit of wood filler cleared that right up.

Then the little decorative brackets were missing so a quick little scroll saw and wella two new brackets - now you can purchase these at Home Depot so no worries there. Lucky for me the mirrors were in good shape. The middle one was removed to work on seperately.
Next a good sanding was in order to get all the surfaces level and smooth to the touch.
Now of course there was some veneer missing and bubbled that just would not do. With a little creativity it is easy to make it work and look just fine. Take a look at the new piece of luan that was added to the sides to fix this problem.
Now, time to paint. I don't use primer, call me silly but isn't it just paint? and what is better for shabby chic than layers and layers of paint. I use good ole flat paint. Any brand will do. I prefer Walmart's Country White, but I also love the pastels offered by Martha Stewart's paints. Flat works the best for sanding. Satin is ok but tends to ball up a bit, but with a little hand sanding you can usually smooth it out ok.
Now first the sanding - I use an orbital sander. I find it fast and easy and it doesn't have to be perfect, just a quick sand unless you have some stubborn areas. Then a damp cloth or tact cloth to clean off the sawdust and you're ready to paint.
I use sponge brushes that way I don't leave any brush strokes. I can also get a more even coat on with them and the sizes are made just right for all those nooks and crannies. I use the ones in the packages from Walmart, they last the longest and there is a good variety of sizes and are inexpensive.
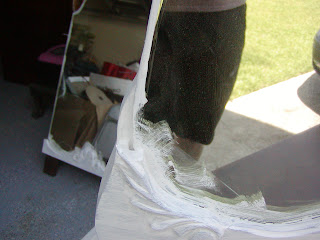
I use 3 to 4 coats. Don't skimp. The first two coats don't have to cover, but the last one or two definately do. You'll know after the 3rd if it needs a 4th. I'd say it is usually a 50/50 chance it will need a 4th coat. When I am painting mirrors, I don't waste my time taking the mirror out of the frame or taping off. Inevitably the paint goes where it's not supposed to and I miss a spot or two, so heck with that. I paint right onto the mirror and get in all those little crevices. I then go back with a razor blade and clean the mirror and make very clean breaks between mirror and frame. It looks much better and I don't have to worry about it.
Now for the fun part. I use the orbital sander to go over all edges and raised parts to expose some of the wood - this is your shabby look. You could also use a different color for the first coat and when sanding the color will come through. You just have to play with the sanding to decide how much to take off and how hard to press on the sander.
Ok, we are almost done. This part is OPTIONAL. I usually don't do this but there are instances on kids furniture or kitchen and bathroom pieces I will. The last thing I do is give it two good coats of spray on varnish. I like American Trends when I can find it. It does not turn yellow. You have to be carefull when using other brands - regardless of what it says on the label. Try a spot first.
Wella - the finished product.....


